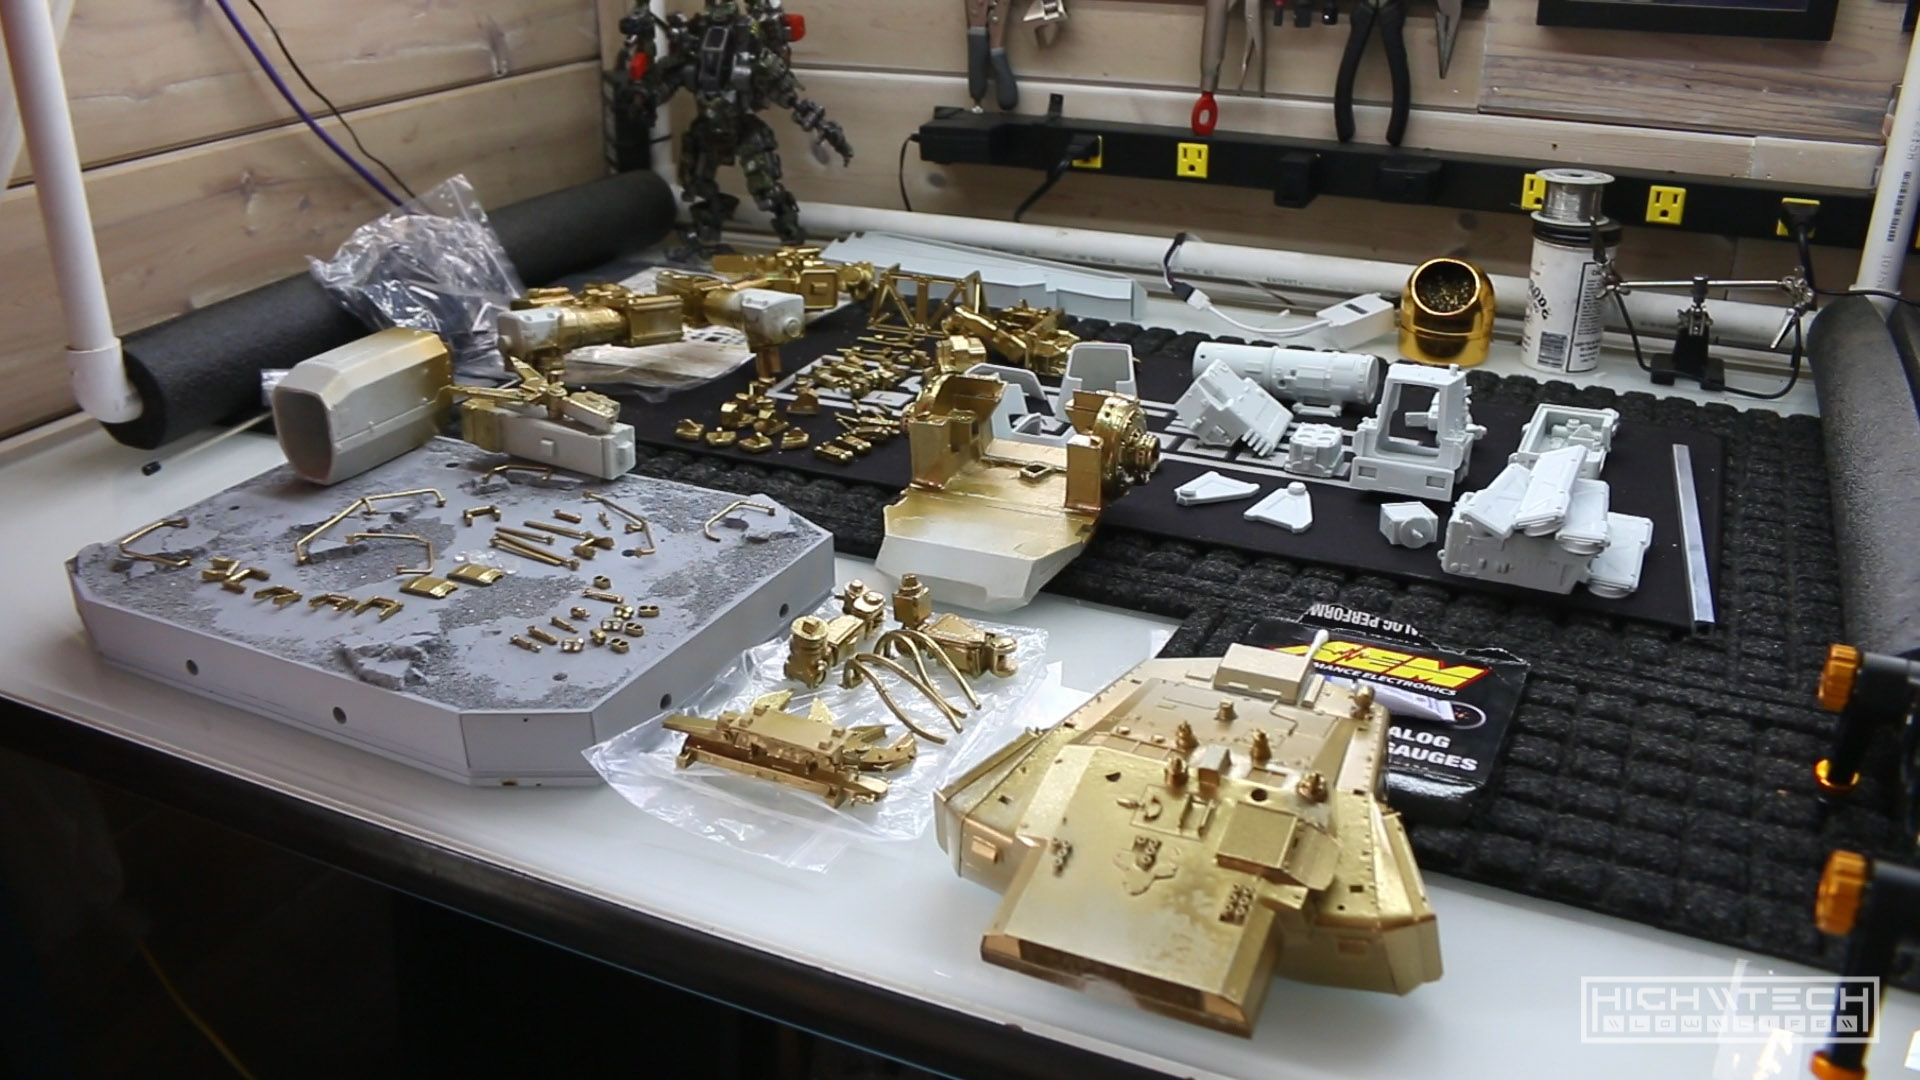
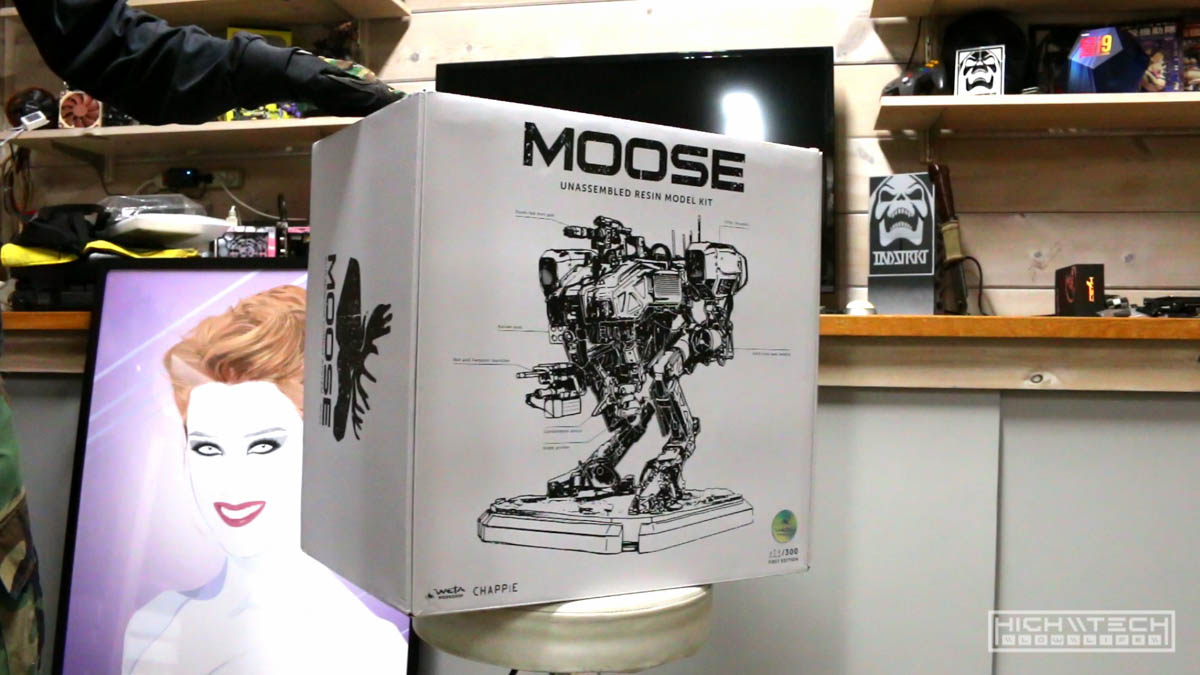
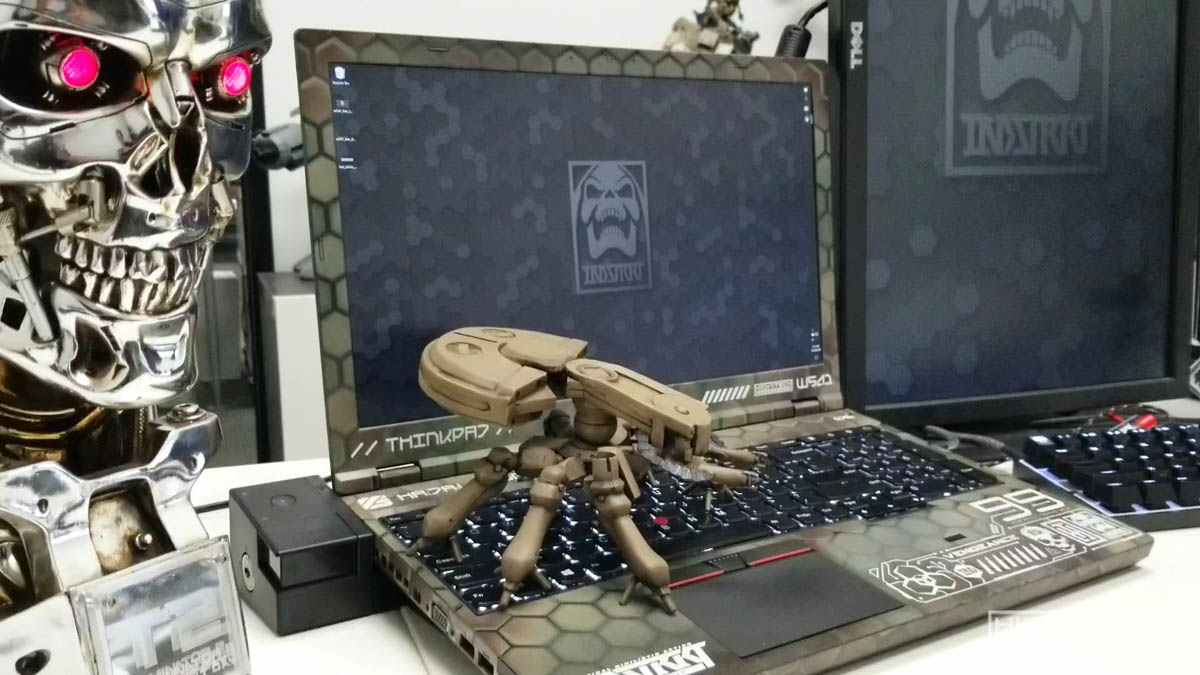
033 \\ THE MOOSE - CHAPPiE - Model Resin Kit - Part 2 \\
Check out the video and full write-up here \\ 033 THE MOOSE - CHAPPiE - Model Resin Kit - Part 2
Part 2 of the epic CHAPPiE MOOSE! This time we finally start assembling and painting! Things go wrong, and also golden.
\\\\\
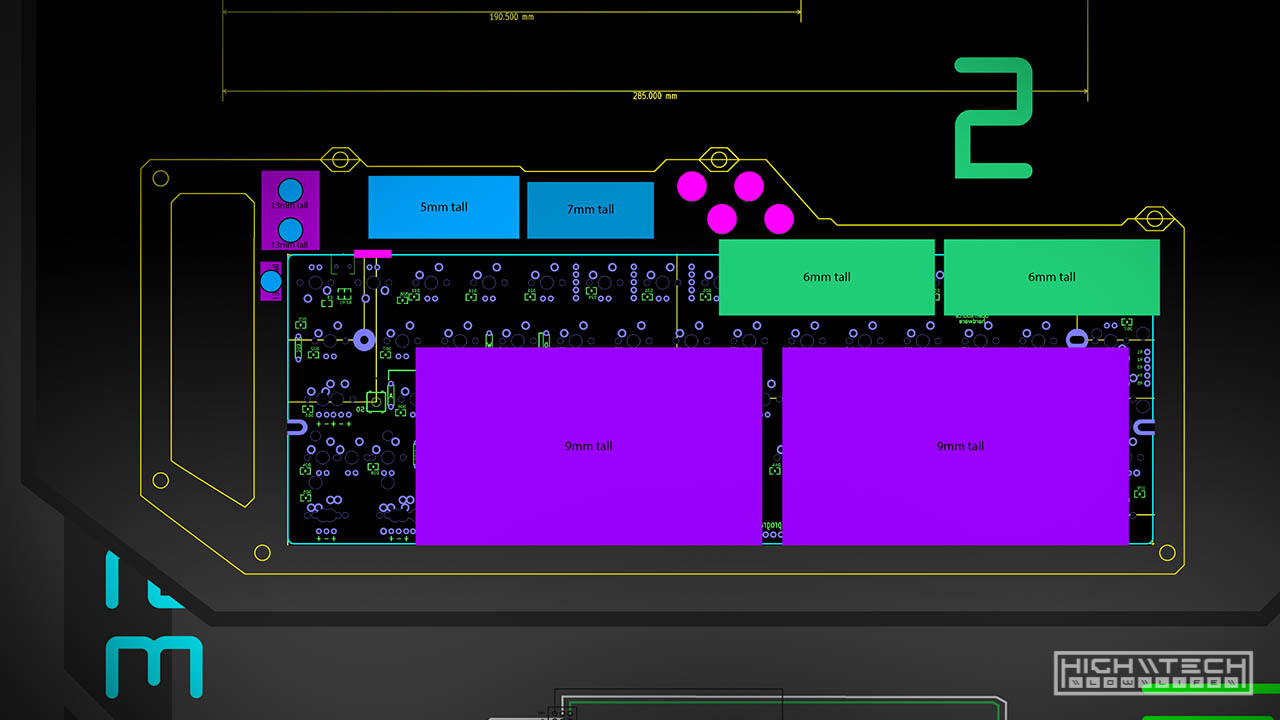
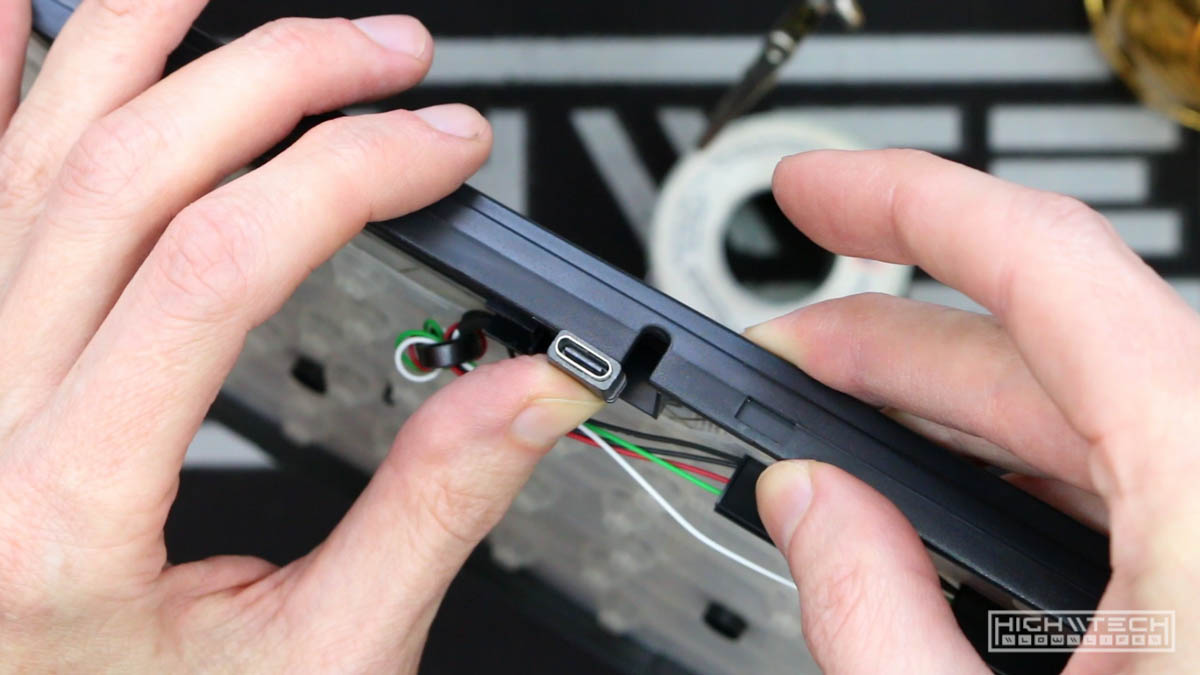
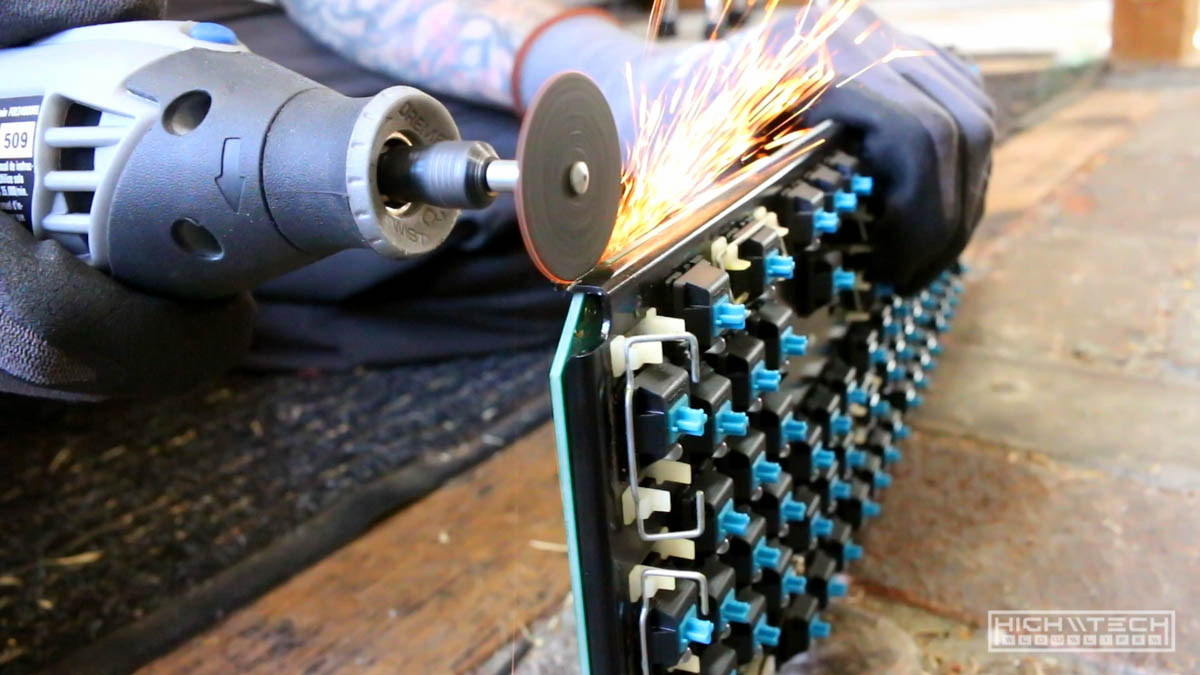
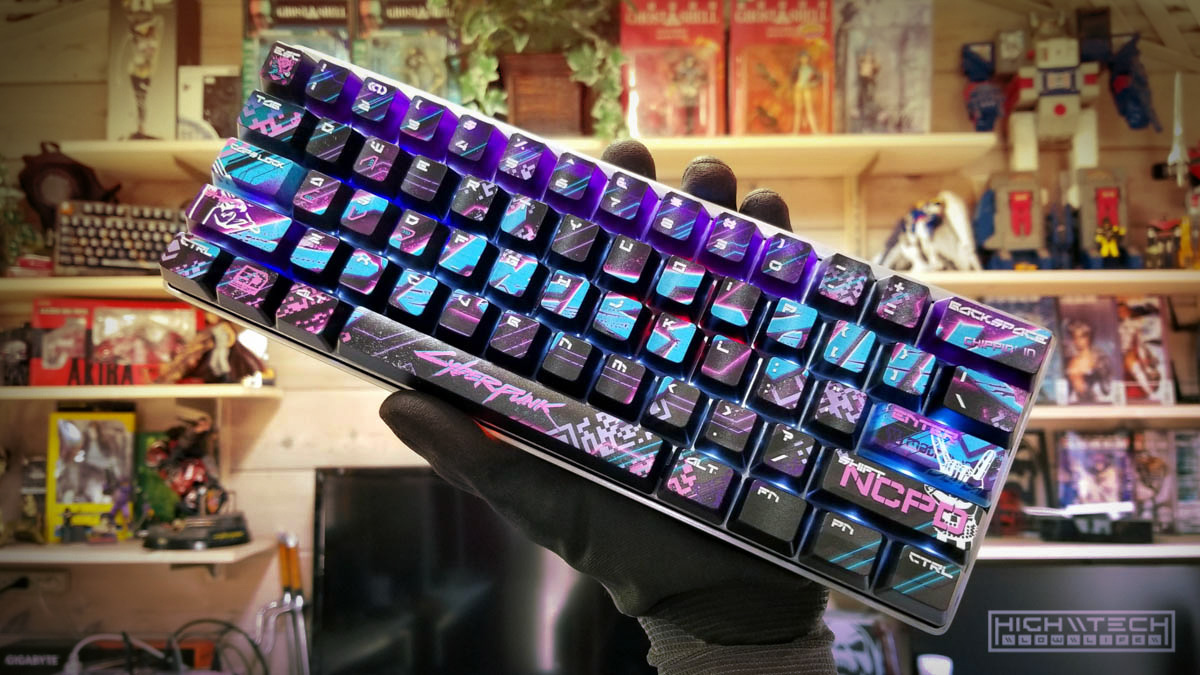
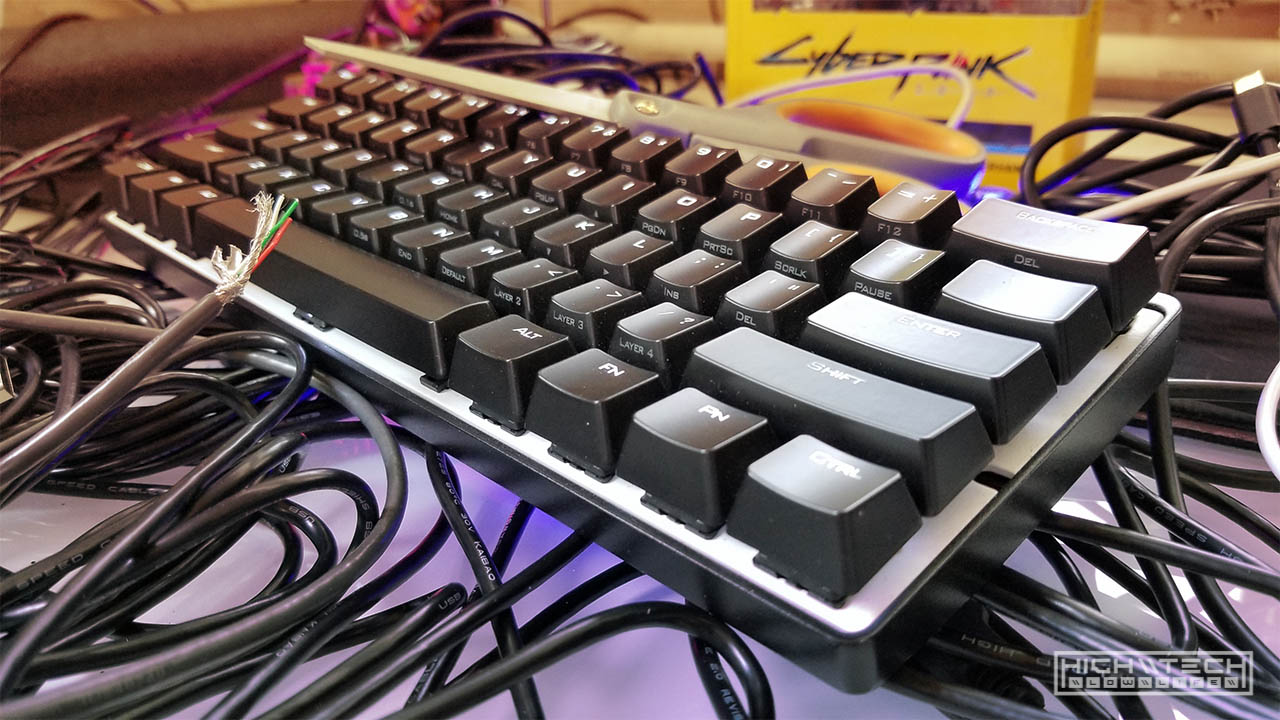
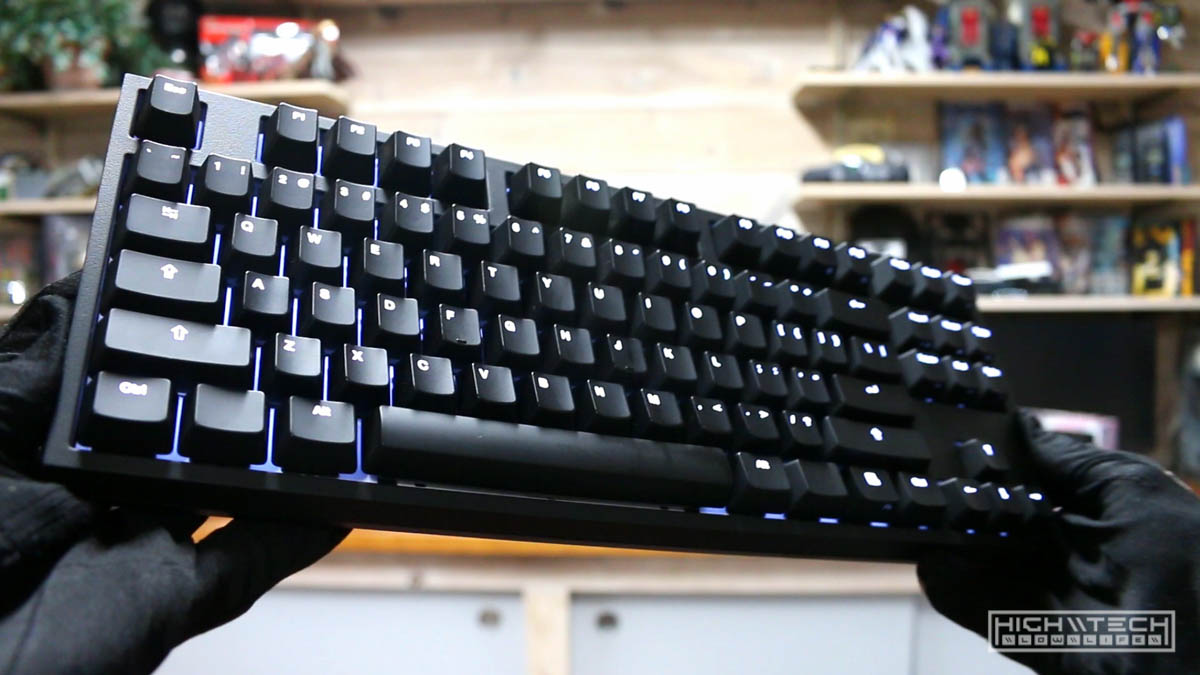
032 \\ Dual Battery Pok3r Wireless Conversion \\
Check out the video and full write-up here \\ 032 Dual Battery Pok3r Wireless Conversion
Part 1 of a mini wireless keyboard build with TWO batteries! What’s better than one battery in your wireless board? Obviously two!
\\\\\
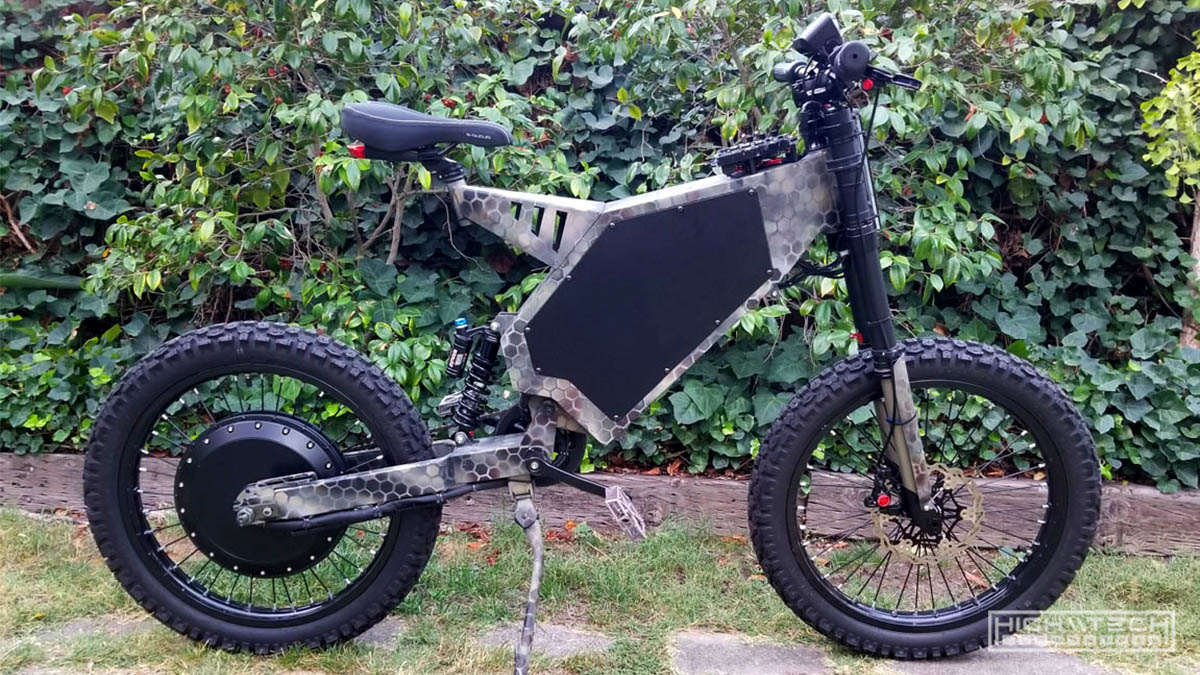
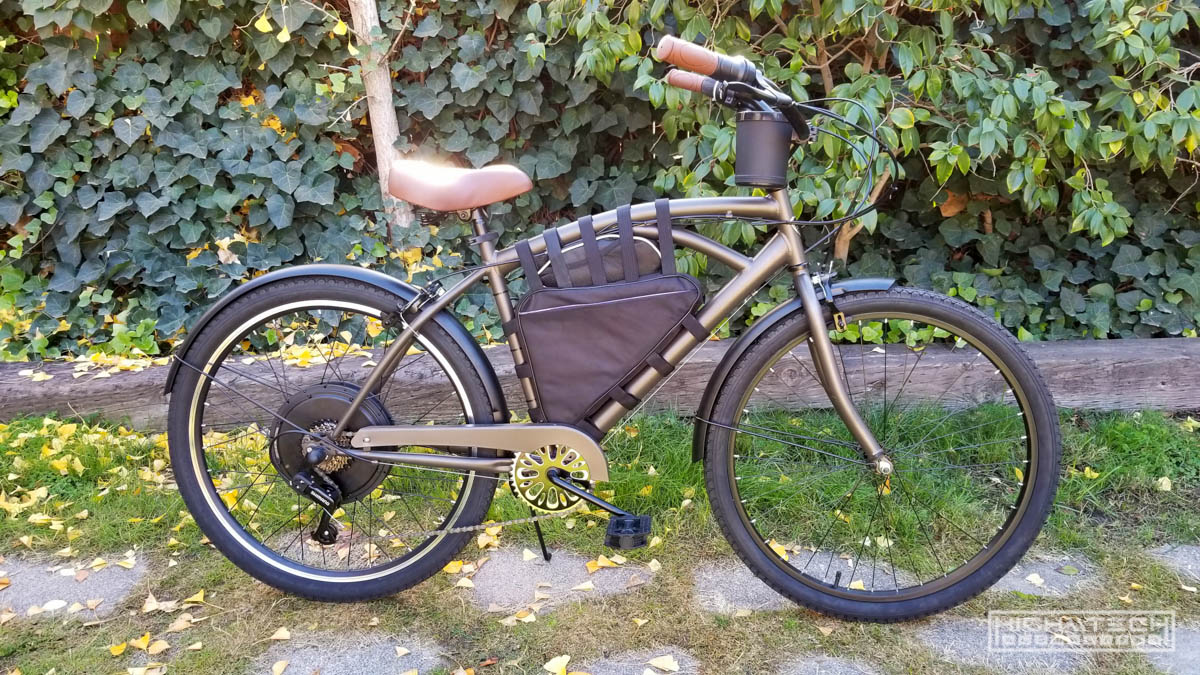
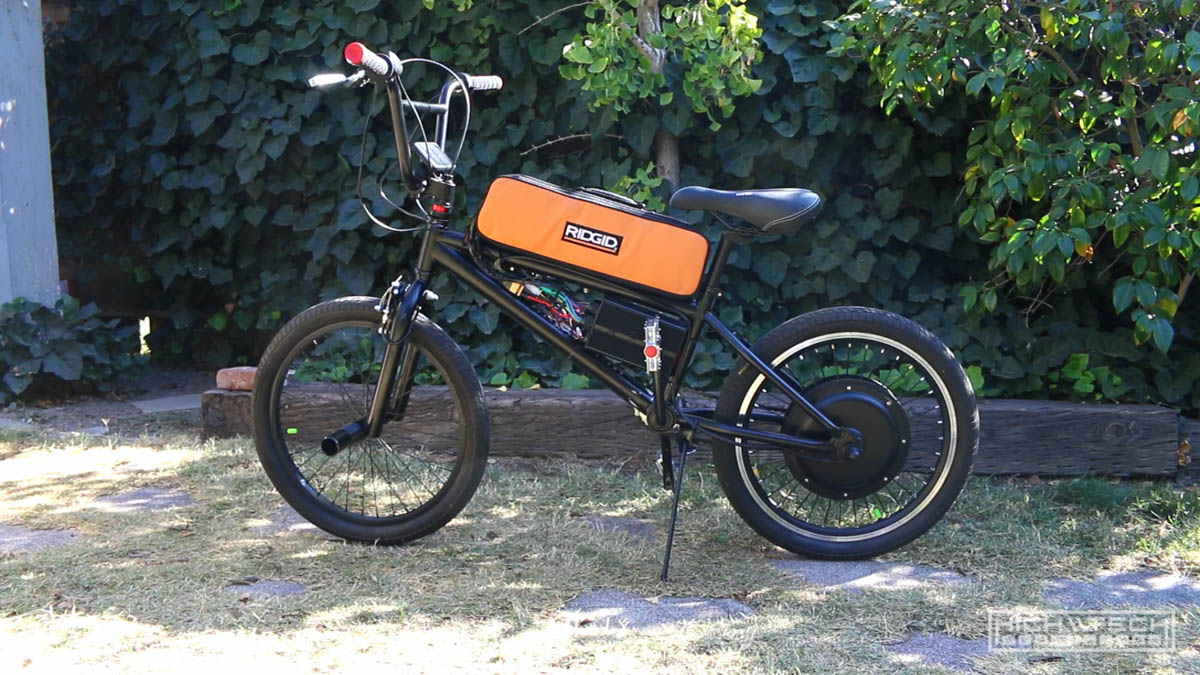
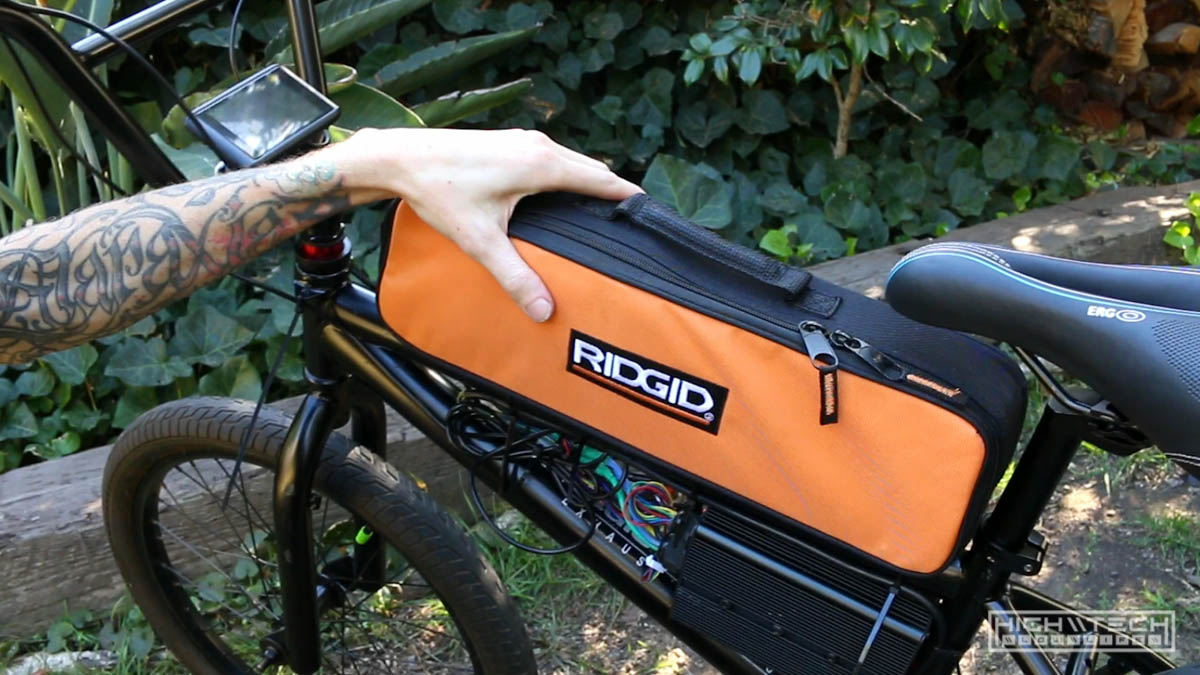
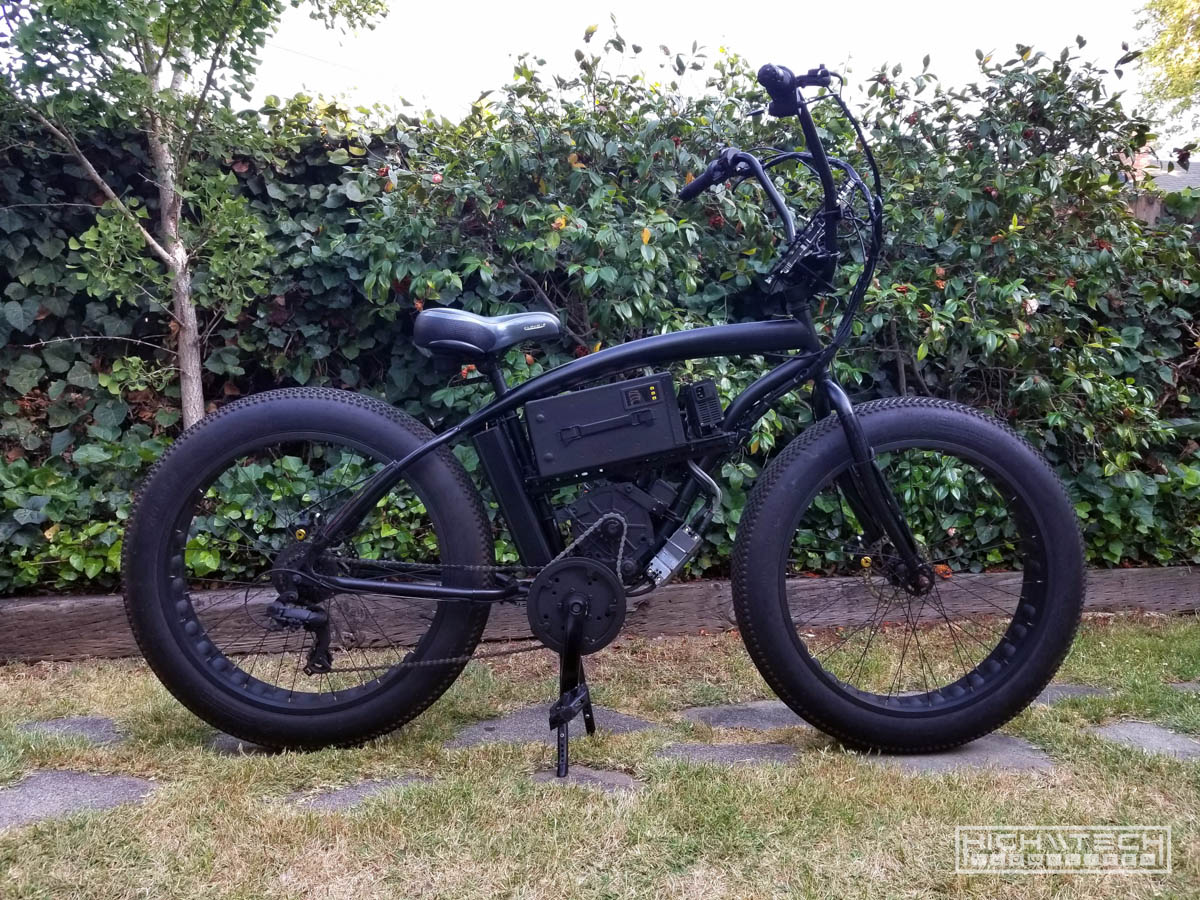
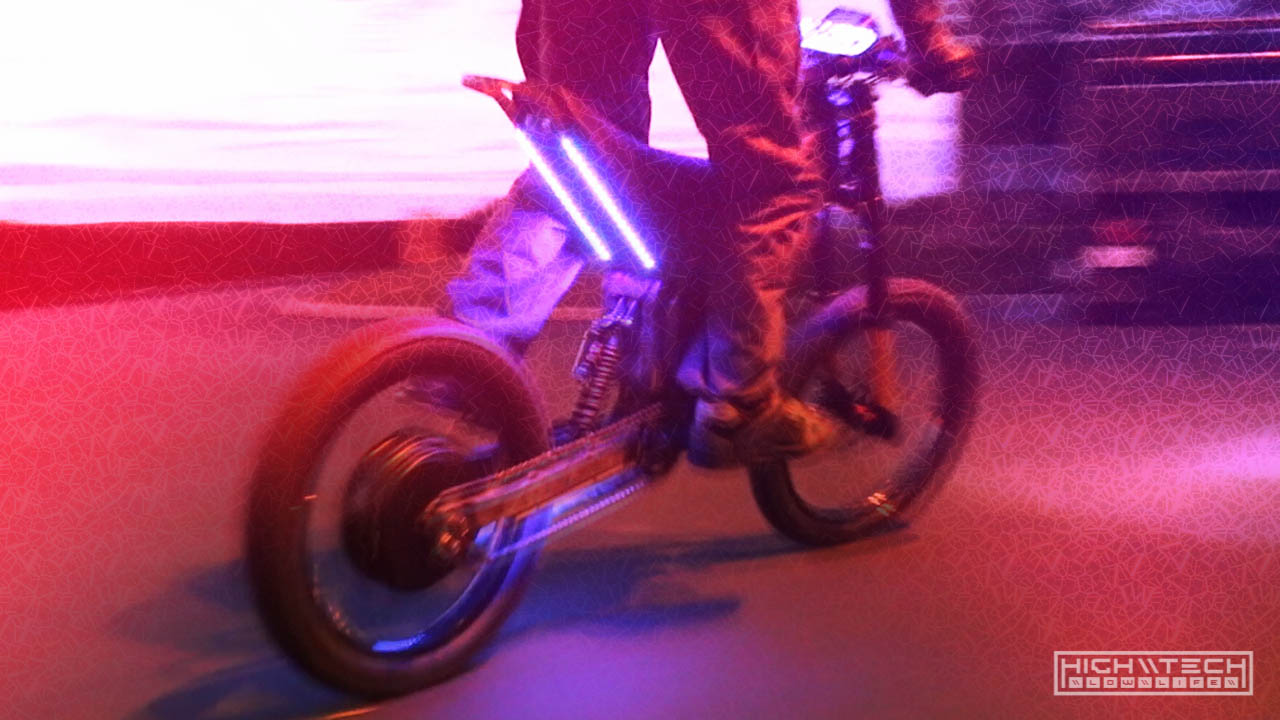
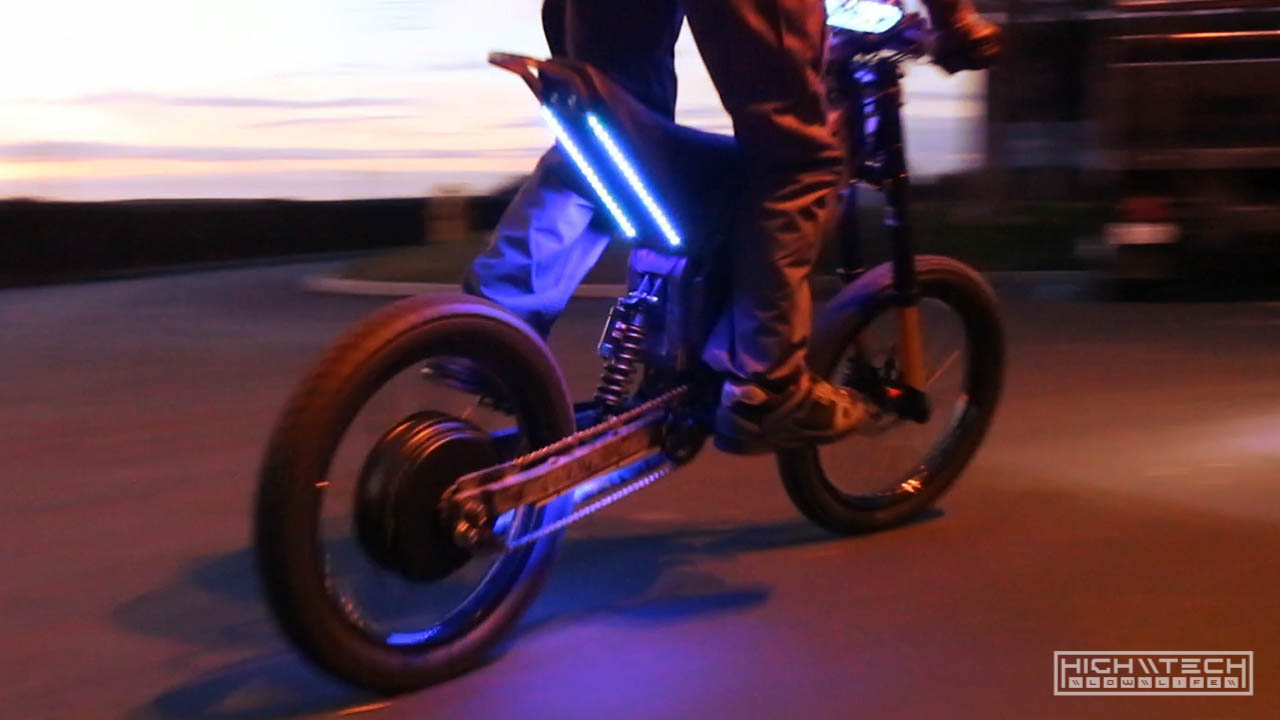
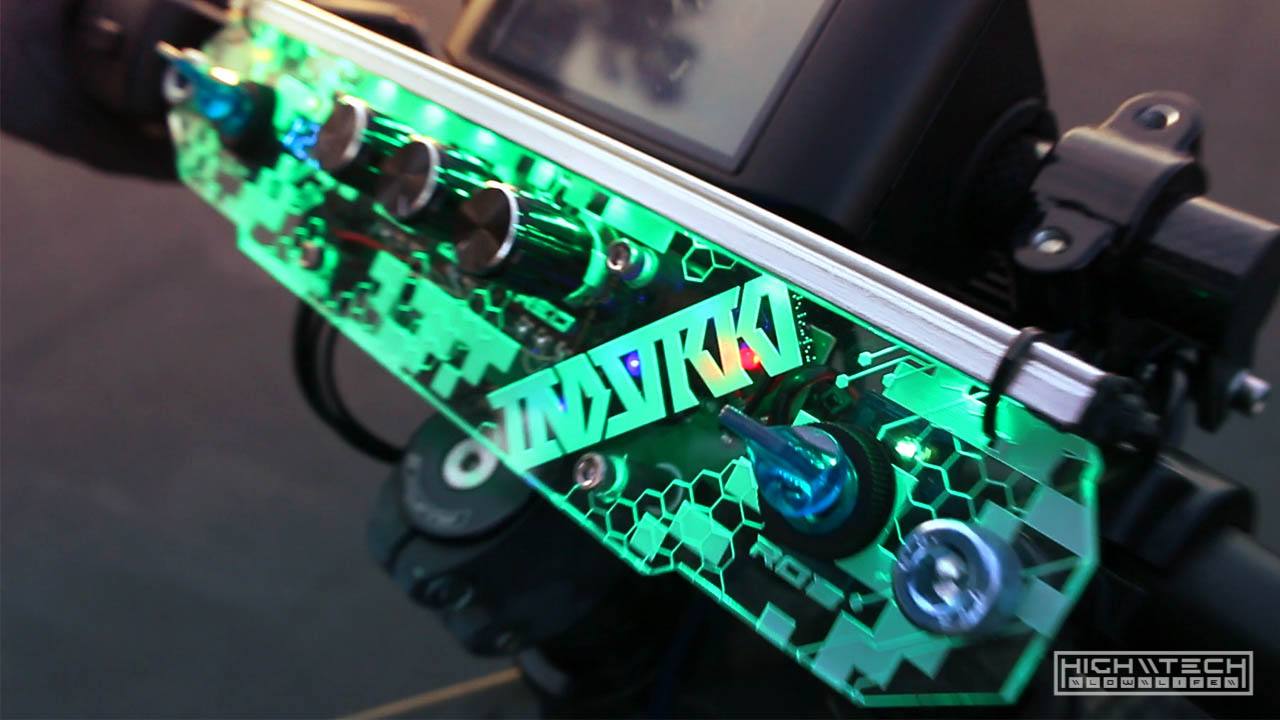
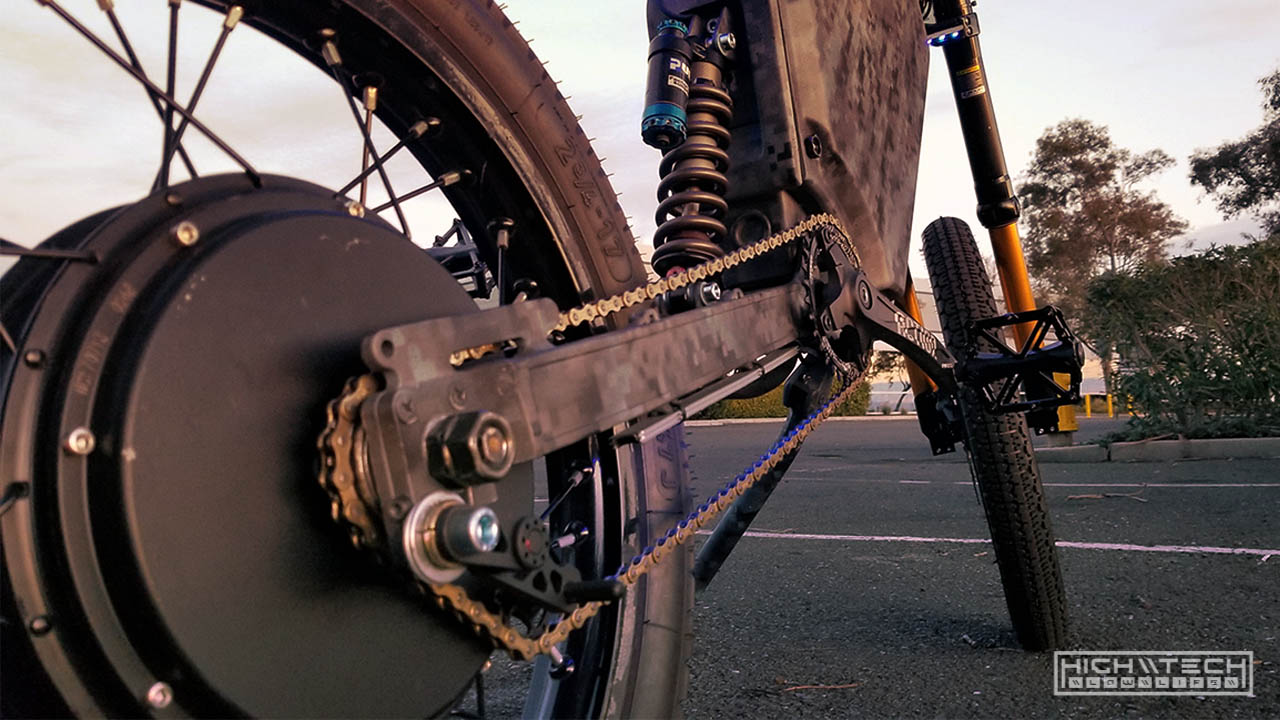
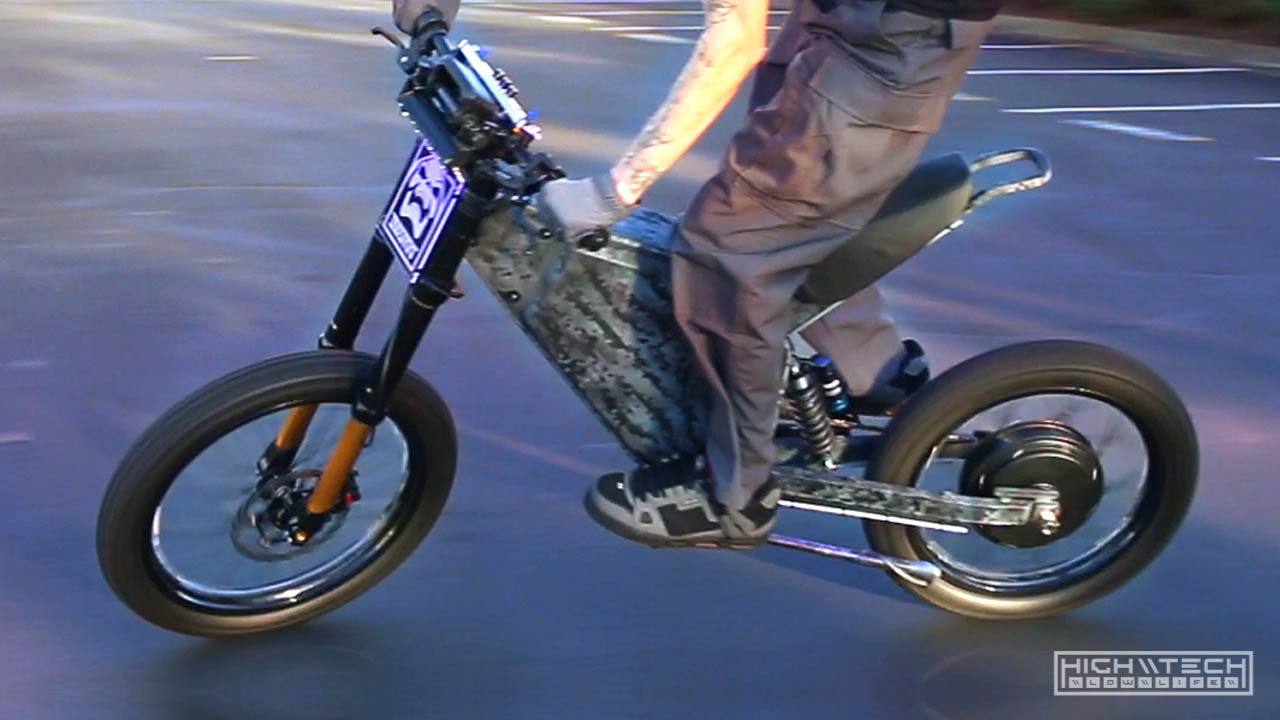
031 \\ Ebike [2.0] - Enduro Hex-Camo 8000W E-Bike \\
Check out the video and full write-up here \\ 031 Ebike [2.0] - Enduro Hex-Camo 8000W E-Bike
Taking it back (again) to (nearly) the beginning! This is the second ebike I had ever made and it’s a bit over the top (again). I learned a lot from my first ebike project and I wanted to make some changes on my second build.
\\\\\
030 \\ THE MOOSE - CHAPPiE - Model Resin Kit - Part 1 \\
Check out the video and full write-up here \\ 030 THE MOOSE CHAPPiE - Model Resin Kit - Part 1
Ever since I saw CHAPPiE I knew if they ever made a model/figure/statue of the MOOSE mech, I would buy it. It was 6 months later I saw the prototype for a production run for this model and then 3 years later it was avaiable for sale and so I bought it, even though it was by far the most expensive model or figure I had ever purchased but I really wanted it.
\\\\\
029 \\ “Call to Action” 8-Bit Animation \\
Check out the video and full write-up here \\ 029 “Call to Action” 8-Bit Animation
I recently hit 1000 subscribers with all of your help, thank you so much for that! I did this in 6 months (which seems crazy) but it made me wonder, could this have happened even sooner?

\\\\\
028 \\ 1000W Cruiser E-Bike Build Guide \\
Check out the video and full write-up here \\ 028 1000W Cruiser E-Bike Build Guide
Build a fast and cheap ebike in 2022! Anyone can follow this step by step how-to guide on how to make a hub motor ebike. This information should be applicable towards any hub motor ebike and help you choose and assemble your ebike conversion kit.
\\\\\
027 \\ Wired Keyboard Detachable Cable Mod \\
Check out the video and full write-up here \\ 027 Wired Keyboard Detachable Cable Mod
Upgrade ANY USB Keyboard - DIY How-To Tutorial - This simple and easy mod will allow you to remove your USB cable. Perfect if your cable is already broken or not working, having a detachable cable allows you to use other cables, longer cables, more premium cables, makes your keyboard more portable and if you ever break your cable again it is easily replaceable.
\\\\\
026 \\ 12+ Year Old Keyboard Restoration + Mods \\
Check out the video and full write-up here \\ 026 Keyboard Cleanup
My mouse died and I realized that my keyboard was disgusting so I cleaned it all up and did some modding and experimentation to try and get an even better typing experience.
\\\\\
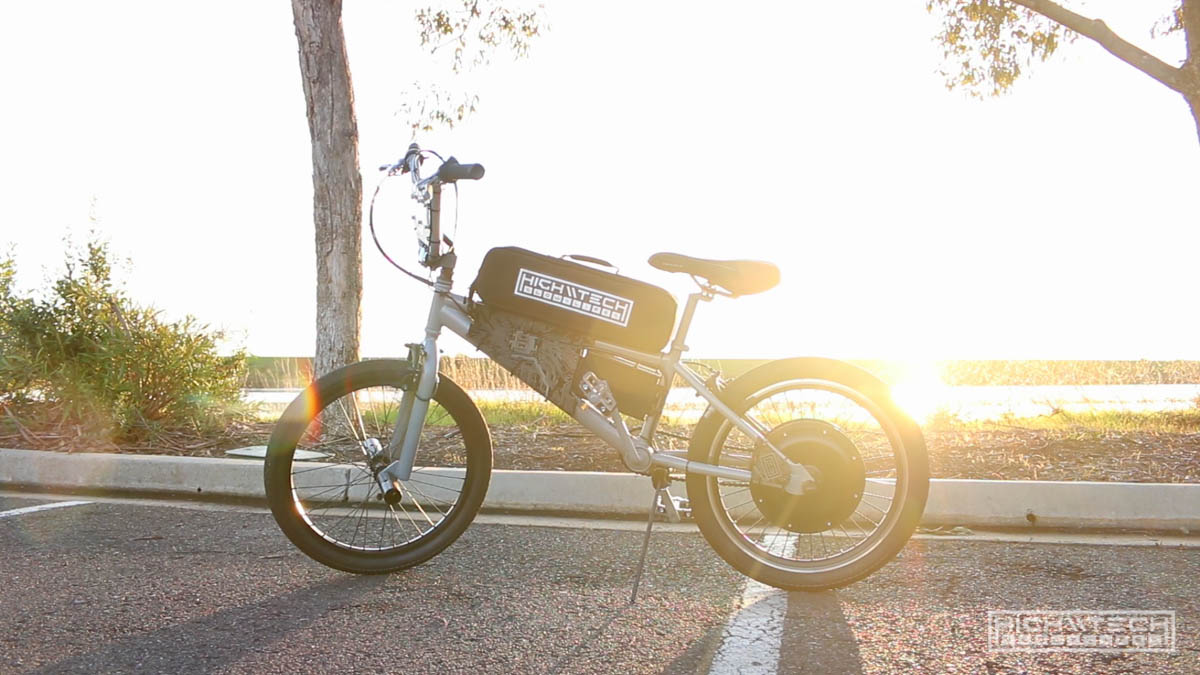
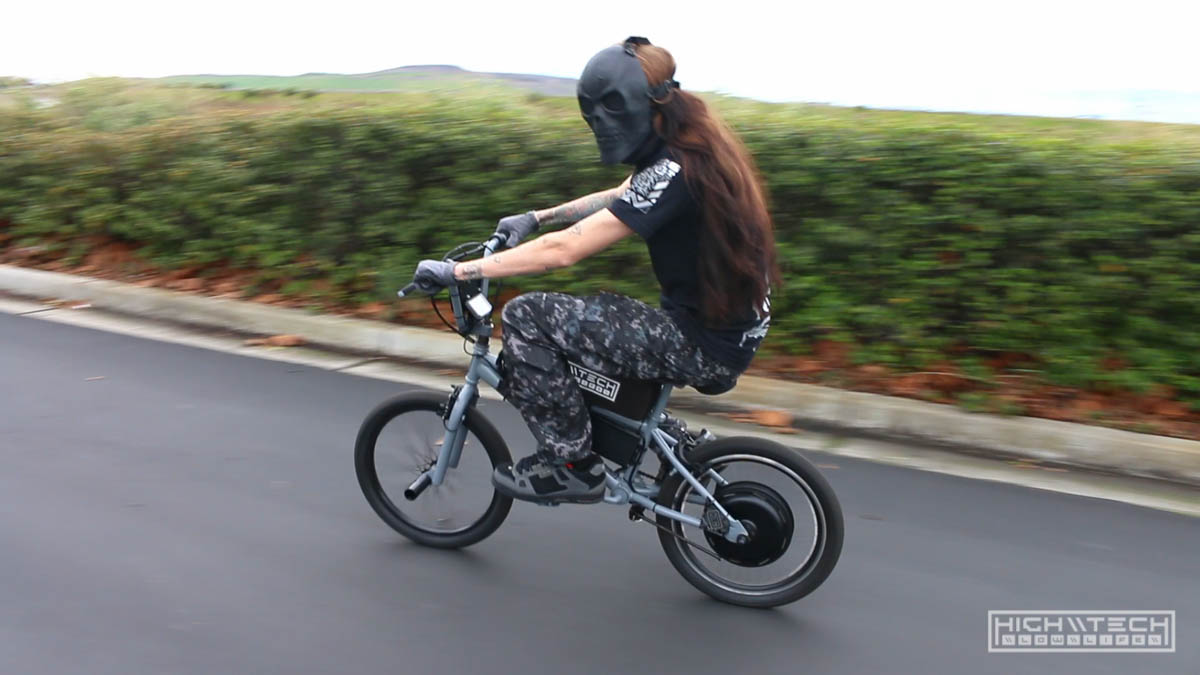
025 \\ 3000W BMX E-BIKE [4.0] TL;DW Version \\
Check out the video and full write-up here \\ 025 BMX E-BIKE - TL;DW Version
This is the TL;DW (too long; didn’t watch) version of my 3000W BMX ebike build - for those who didn’t have the time to watch the 6-part series I have condensed it all down in ‘rapid-fire’ pace in 6 minutes!
\\\\\
024 \\ 3000W BMX E-BIKE [4.0] PART 6 - FINAL \\
Check out the video and full write-up here \\ 024 BMX E-BIKE - Part 6
In part 6 we finally finish the entire build. We do have a few small things to finish up, but after that I can take it on a speed run, test ride and show it off in all it’s glory!
\\\\\
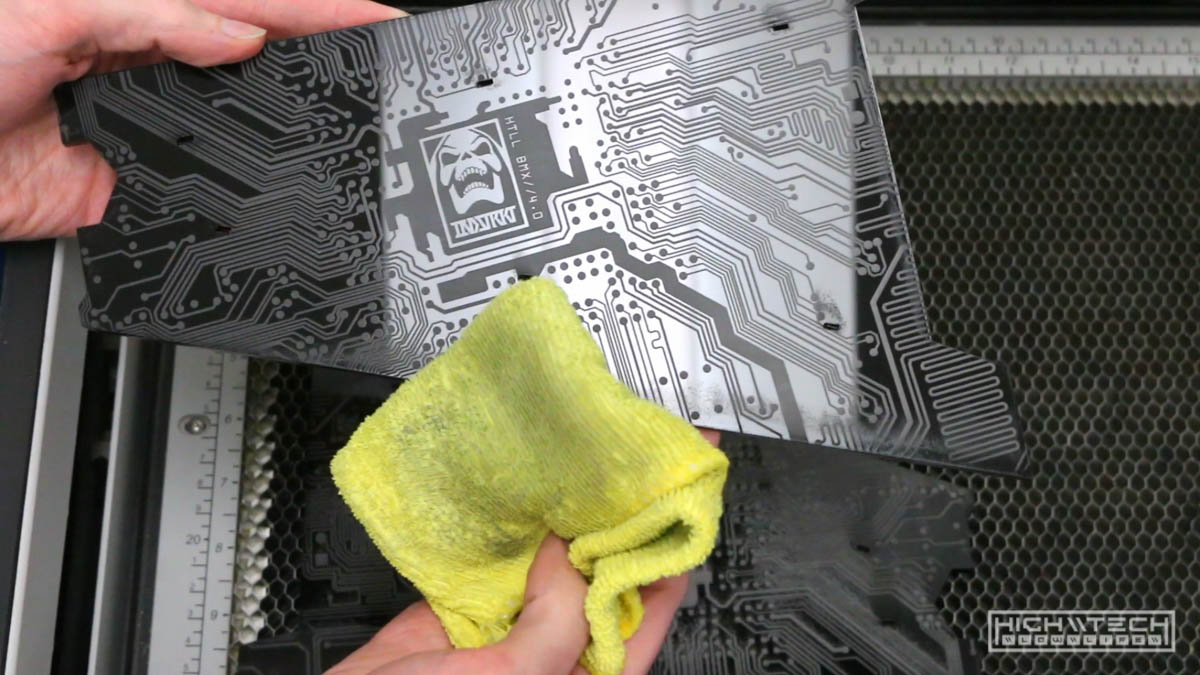
023 \\ 3000W BMX E-BIKE [4.0] PART 5 \\
Check out the video and full write-up here \\ 023 BMX E-BIKE - Part 5
In part 5 we’re continuing on with the reassembly now that all of the parts of painted up and ready to go. In this episode there is a lot to get through, including some additional printing as well as all of the acrylic engraving and cutting.
\\\\\
022 \\ 3000W BMX E-BIKE [4.0] PART 4 \\
Check out the video and full write-up here \\ 022 BMX E-BIKE - Part 4
In part 4 we’re digging into all of the cosmetic modifications I have planned for this build. I actually didn’t really plan on putting too much time or work into making this look nice, this was supposed to be a ‘beater’ that I could thrash on, but that didn’t really work out, so here I am pouring way too much time and energy into another build!
\\\\\
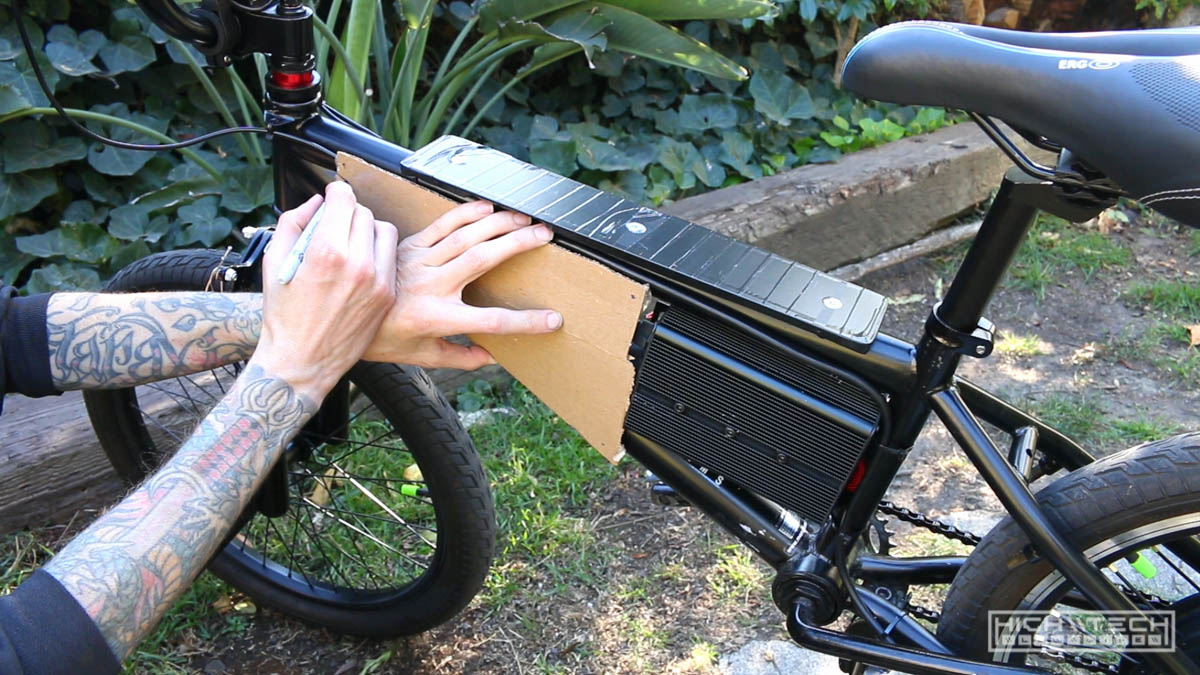
021 \\ 3000W BMX E-BIKE [4.0] PART 3 \\
Check out the video and full write-up here \\ 021 BMX E-BIKE - Part 3
In part 3 we’re on to more battery modifications, this time we’re cleaning up all of these wires so that this ‘pack’ will finally fit in the battery bag. This ‘pack’ was what I assumed to be a single battery but to my surprise when I opened the bag there were 6 individual packs. I had never seen a battery set up like this, and the seller on eBay didn’t say anything about there being multiple little packs split up like this.
\\\\\
020 \\ 3000W BMX E-BIKE [4.0] PART 2 \\
Check out the video and full write-up here \\ 020 BMX E-BIKE - Part 2
In part two I start off by swapping the tire from the stock rear rim to the new motor rim. I also replaced the tubes in the front tire too ~ I swear by these ‘green slime’ tubes, they’re much thicker and also have a ‘run flat’ type of liquid inside that if you get smaller punctures they will seal themselves. I now also use these plastic (nylon?) inserts that offer even better protection, after doing these mods to your tires you will no longer ever have flats!
\\\\\
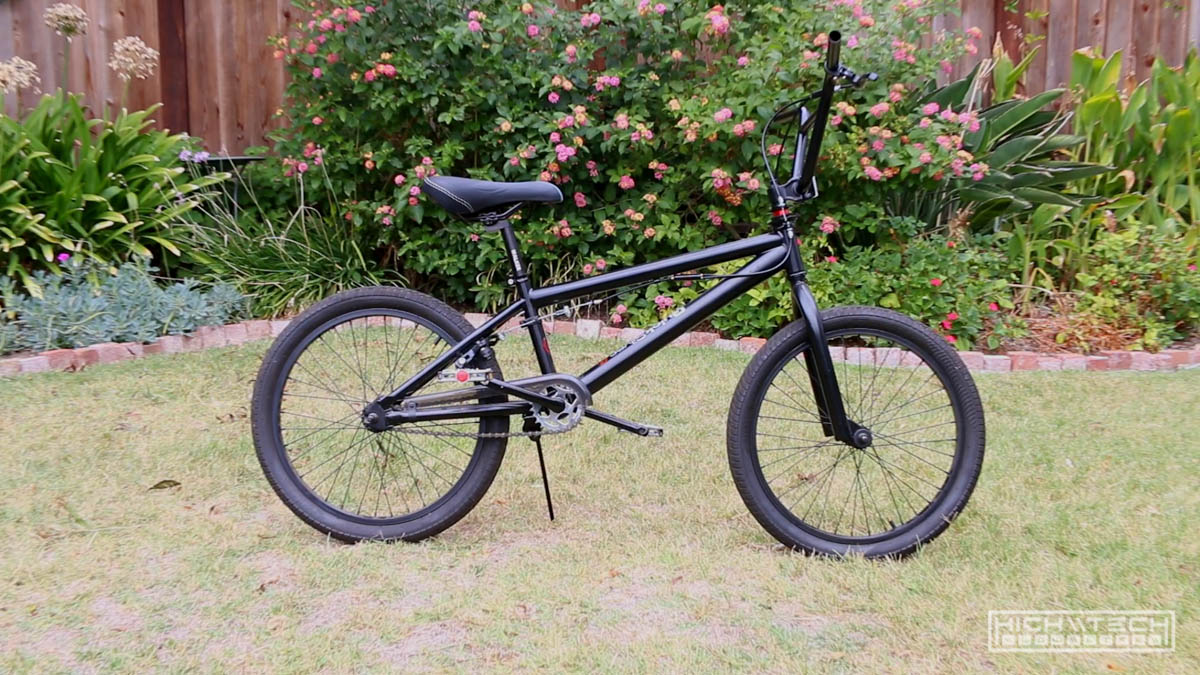
019 \\ 3000W BMX E-BIKE [4.0] PART 1 \\
Check out the video and full write-up here \\ 019 BMX E-BIKE - Part 1
I started out this build just wanting to make a grocery-getter, something small that I could ride to the local grocery store on my break from work to pick up some food. I also was just planning on making it a beater so that if something happened to it, I wasn’t going to be too upset about it. Of course I was planning on just throwing some parts at it and building it as quickly as possible, but it never turns out that way, so I ended up pouring way too much time into it and making it ‘too nice’.
\\\\\
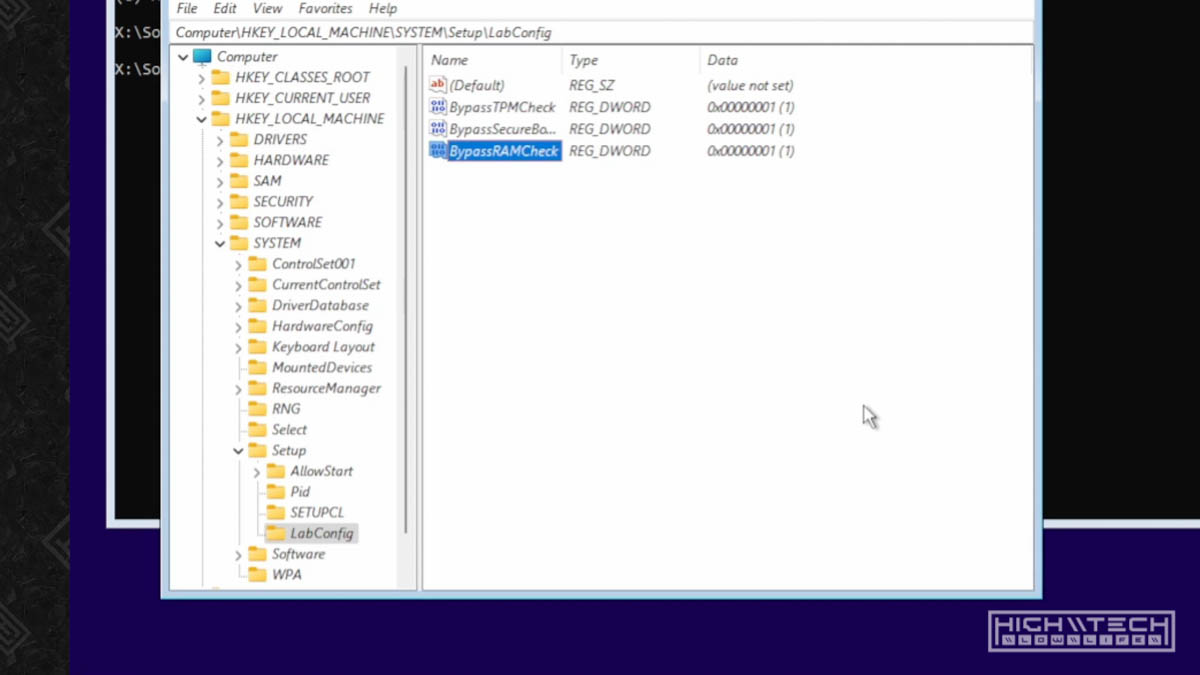
018 \\ Install Windows 11 On Old Hardware \\
Check out the video and full write-up here \\ 018 Install Windows 11
This guide will allow you to install Windows 11 on older hardware, or any computers that don’t fit the requirements for Windows 11 installation. You will get an error for either TPM module is not up to date, or not the current version 2.0, or you will get an error that your processor is not valid, or might get one that you don’t have enough RAM to install, either way it should be your choice on installing Windows 11 on your computer, not Microsoft’s.
\\\\\
017 \\ Windows Vertical Taskbar \\
Check out the video and full write-up here \\ 017 Windows Vertical Taskbar
Gaining more vertical pixels with this one simple trick! A man rants about Windows UI design and chaos ensues! You’ve been using Windows taskbar wrong your whole life! (Prove me wrong!) Ok so maybe this claim is a bit hyperbolic, but hear me out! Our monitors have changed quite a bit over time, the windows taskbar has not (really) and this is a problem.

\\\\\
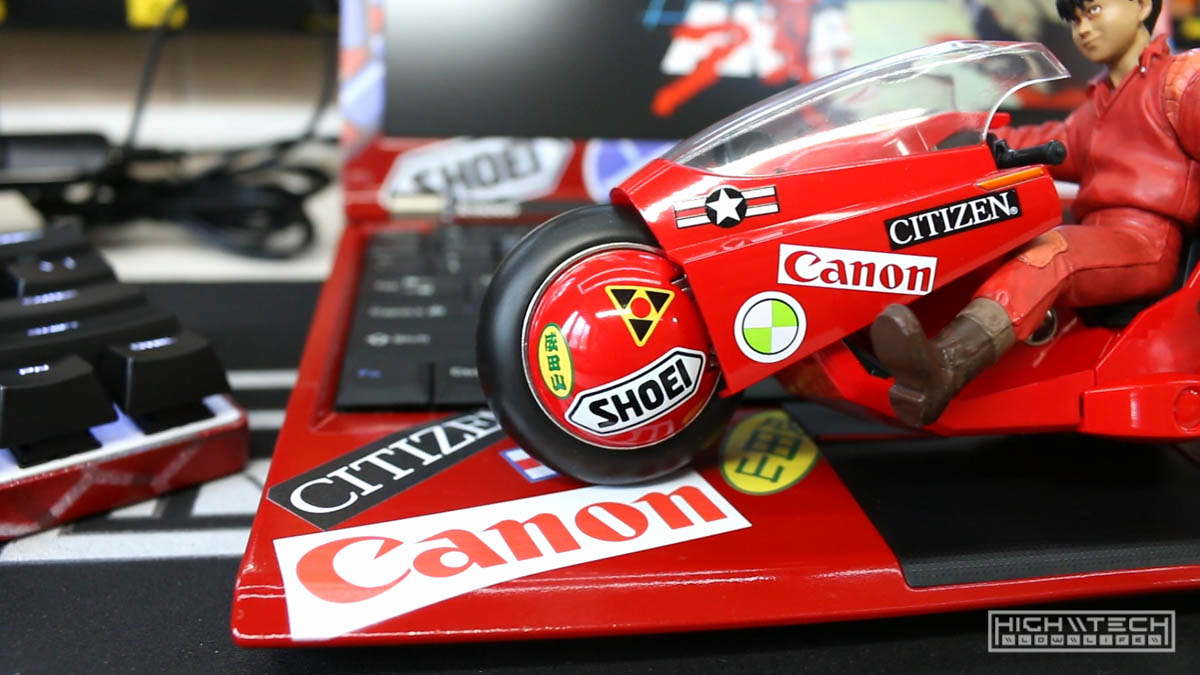
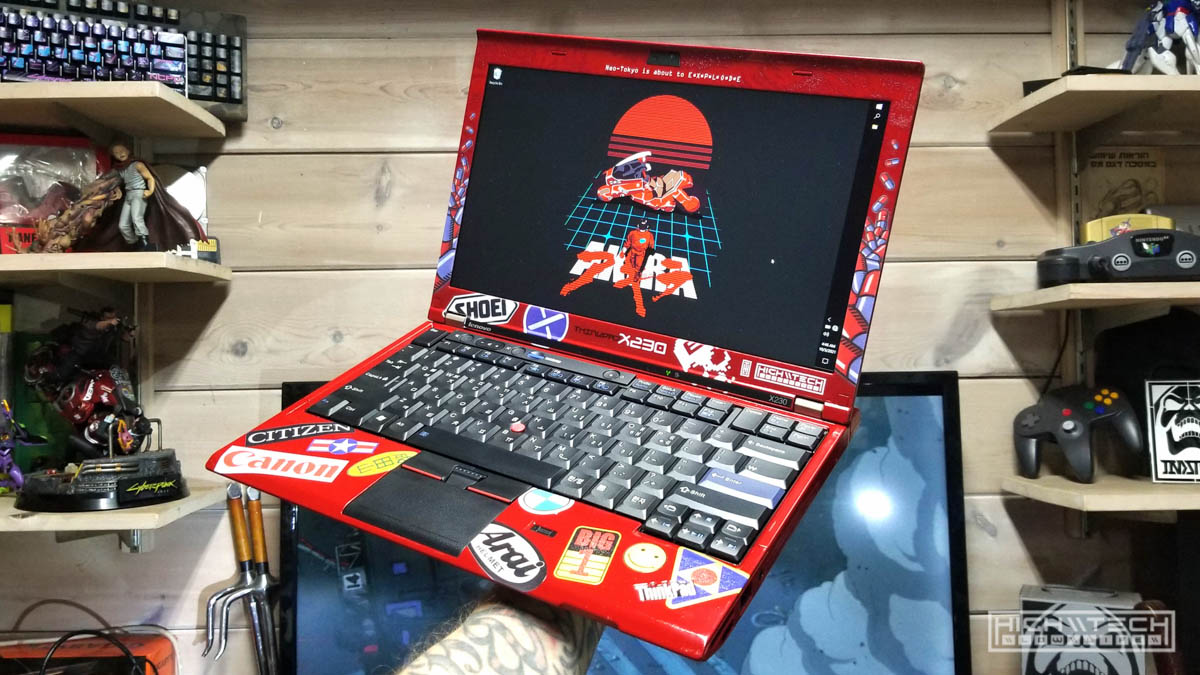
016 \\ AKIRA (Kaneda’s Bike) Custom Thinkpad Lenovo X230 Laptop - Part 2 \\
Check out the video and full write-up here \\ 016 AKIRA Thinkpad Lenovo X230 Laptop - Part 2
This is part 2 of transforming my cheapo stock Lenovo Thinkpad X230 into an AKIRA themed iconic red machine (Kaneda’s Bike). In this final part we implement a really cool mod made by the Russian bada$$ Nitrocaster, this mod allows you to stuff in a full HD panel into your tiny 12.5” X230! Also on the dockett is upgrading from 8GB of mismatched blechhh ram, to 16GB of matching ram! We’re also tossing in a 240GB MSATA SSD, I threw in a new 500GB SSD for data, and finally a Korean X220 keyboard!
\\\\\
015 \\ AKIRA (Kaneda’s Bike) Custom Thinkpad Lenovo X230 Laptop - Part 1 \\
Check out the video and full write-up here \\ 015 AKIRA Thinkpad Lenovo X230 Laptop - Part 1
After successful completion of my previous Lenovo Thinkpad W541 laptop painting project, I wanted to challenge myself some more with an Akira themed build. Akira is by far one of my most favorite cyberpunk anime films I have ever seen and there is nothing more iconic than Kaneda’s bike! I have had this idea in my head for a very red thinkpad for a while now and I wanted to bring it to life. Check out part 1!
\\\\\
014 \\ Ebike [1.0] - 18KW Urban “Super Cruiser” E-Bike \\
Check out the video and full write-up here \\ 014 - Ebike [1.0] - 18KW Urban “Super Cruiser” E-Bike
Taking it back to the beginning! This is the first ebike I had ever made and it’s a bit over the top. This all started because a few friends at work said they wanted to make their own ebikes and prior to that I wasn’t particularly interested in bikes or ebikes for that matter. I of course had to out-do my coworkers so I decided to build a pretty crazy ebike for my first one.
\\\\\
013 \\ WASD CODE VP3 60% Wireless Keyboard Conversion - Part 2 \\
Part 2 of the mini wireless build, we finish things up with a new battery, case modifications, plate paint stripping, new switches, new LEDs and much more!
\\\\\
012 \\ WASD CODE VP3 60% Wireless Keyboard Conversion - Part 1 \\
Check out the video and full write-up here \\ 012 - WASD CODE VP3 60% Wireless Keyboard Conversion
Back at it again with the wireless conversions, this time we’re doing a smaller 60% CODE VP3, I didn’t even know if I could pull it off so check it out!
\\\\\
011 \\ Custom 5000W Digi-Camo E-bike [Ebike 3.0] - TL;DW Ver.
Check out the video here \\ 011 - Custom 5000W Digi-Camo E-bike - TL;DW Ver.
This is the “Too long; didn’t watch” version of the build - I know not everyone has time to watch the full 5 part series, so I boiled it all down and squeezed the entire build into a six minute and thirty second video!
\\\\\
010 \\ Custom 5000W Digi-Camo E-bike [Ebike 3.0] - Part 5
Check out the video and full write-up here \\ 010 - Custom 5000W Digi-Camo E-bike - Part 5
The final part of building a custom DIY 5000W [5KW!] 54MPH monster ebike! In this part we button everything up and apply the finishing touches. Then we take it out on the road for some speed runs!
\\\\\
009 \\ Custom 5000W Digi-Camo E-bike [Ebike 3.0] - Part 4
Check out the video and full write-up here \\ 009 - Custom 5000W Digi-Camo E-bike - Part 4
Part 4 of building a custom DIY 5000W [5KW!] 54MPH monster ebike! In this part we finally get a headlight solution that works and also finalize and finish up the custom acrylic dashboard!

\\\\\
008 \\ Custom 5000W Digi-Camo E-bike [Ebike 3.0] - Part 3
Check out the video and full write-up here \\ 008 - Custom 5000W Digi-Camo E-bike - Part 3
Part 3 of building a custom DIY 5000W [5KW!] 54MPH monster ebike! In this part we take care of most of the custom edge-lit acrylic dashboard building. We’re still stumped by the throttle woes we’ve been having, but keep pressing on.
\\\\\
007 \\ Custom 5000W Digi-Camo E-bike [Ebike 3.0] - Part 2
Check out the video and full write-up here \\ 007 - Custom 5000W Digi-Camo E-bike - Part 2
Part 2 of building a custom DIY 5000W [5KW!] 54MPH monster ebike! In this part we run into some problems with mounting the LCD screen, as well as the brakes, oh and also the kickstand… just a lot of problems, but we do find solutions for them. We also mount the charge port and take care of a lot of the electronics including a metric ton of LED strip wiring!
\\\\\
006 \\ Custom 5000W Digi-Camo E-bike [Ebike 3.0] - Part 1
Check out the video and full write-up here \\ 006 - Custom 5000W Digi-Camo E-bike - Part 1
Building a custom DIY 5000W [5KW!] 54MPH monster ebike! Complete with a subdued urban digital paint job, custom edge-lit acrylic dashboard and RGB LEDs everywhere! 150 amp controller, 5KW hub motor and 72V 30Ah battery pack. This was only my 3rd ebike I have ever built so a lot of mistakes were made along the way and I learned a ton.
\\\\\
005 \\ Custom Painting a Laptop - ThinkPad W541 Hex-Camo
DIY Painting a laptop? You should totally paint your laptop! (maybe), actually maybe not. Watch me take a normal Lenovo ThinkPad W541 workstation computer and give it a custom hex-camo paint job, I also ended up adding some UV printing and upgrading the CPU to a Intel Core i7 4940MX! I made a few mistakes along the way but nothing that some perseverance couldn’t overcome. It was a ton of work but the finished product was completely worth it in the end! This isn’t really a guide, maybe something more to inspire you to create your own.
\\\\\
004 \\ USB Keyboard to Wireless Bluetooth Conversion
Check out the video and full write-up here \\ 004 - USB Keyboards Wireless Conversion
This is for those who want to take their existing USB keyboard and make it wireless, those who enjoy taking things apart, voiding warranties, soldering, cramming things into small spaces… you get the idea. Some really awesome keyboards just simply aren’t offered with a wireless option, and finally (thanks to a few more recent advancements in tech) this is now feasible in a (somewhat) elegant DIY package.
\\\\\
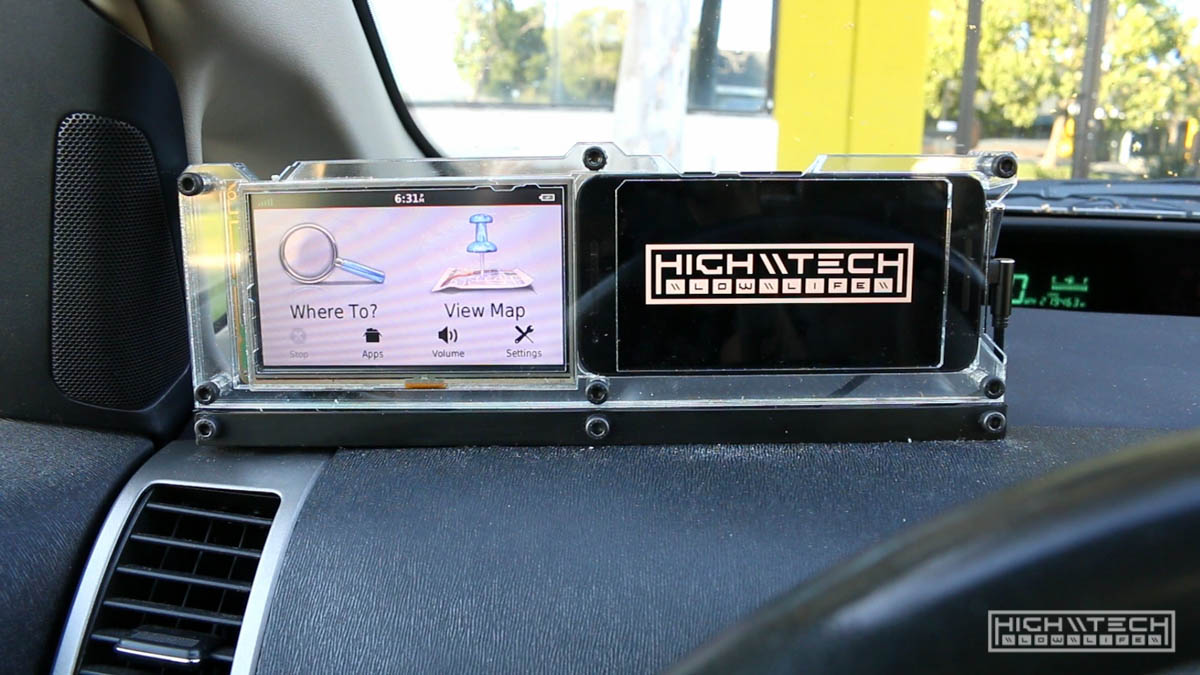
003 \\ GPS + Phone Car Dashboard Mount
Check out the video and full write-up here \\ 003 - GPS + Phone Mount
My phone will automatically turn on and start playing music when I turn my car on! I know most people just use their current phones to play music in their cars and I get that, but I just like having a dedicated source that is with the car, plus it allows me to install another screen and more tech in my car and why would I pass up that opportunity?
\\\\\
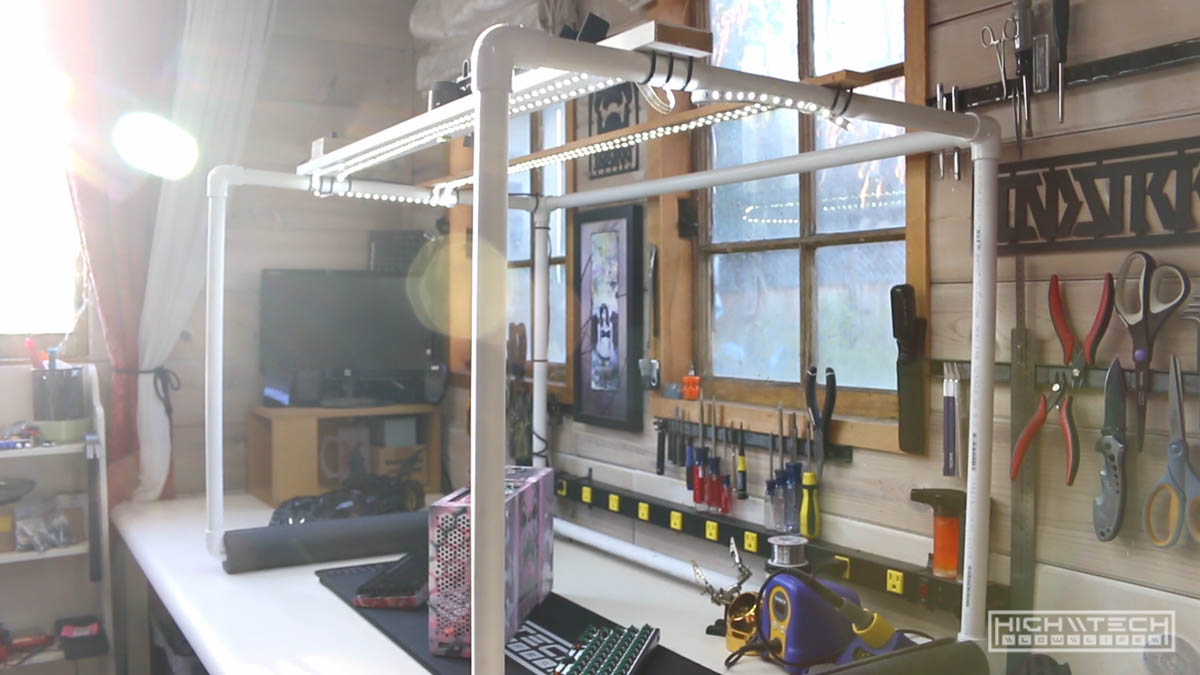
002 \\ Overhead Camera Mount with LED Lighting
Check out the video and full write-up here \\ 002 - Overhead Camera Mount
If your camera is right over your working space it frees up a lot of space to move around and also gets the best shot possible. Making mroe videos I figured that a lot of what I would be capturing would probably be on a desk or workbench and after my first video trying to work with a camera in front of you is annoying and one over your shoulder would not get a very good shot, and also be annoying. Since you’re already making something that is hovering above your workspace why not stick some cheap LED strips on it and make it more useful.
\\\\\
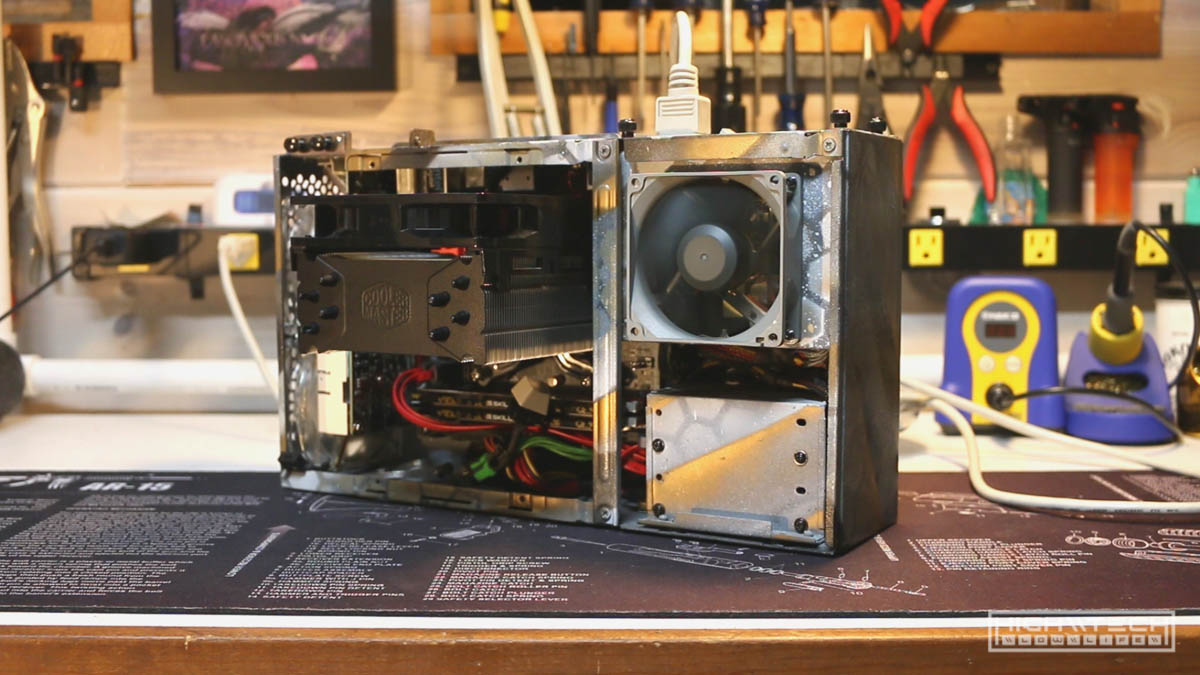
001 \\ MINI-ITX Digital Audio Workstation (DAW)
Check out the video and full write-up here \\ 001 - Mini DAW Workstation
You should totally paint your computer parts! Not only is it easy and cheap, but you can breathe new life into tired or aesthetically worn components. Add your own custom personalized touch and stand apart from all the ‘LTT and Reddit told me to buy this -so now I have a black box with too much rgb and tempered glass side panels- just like everyone else’ out there. The outcome may not be the most beautiful or even well-executed, but at least you can be different.