
\\ Install Windows 11 On Old Hardware \\
Quickly explaining in under 2 minutes to get you up and running!
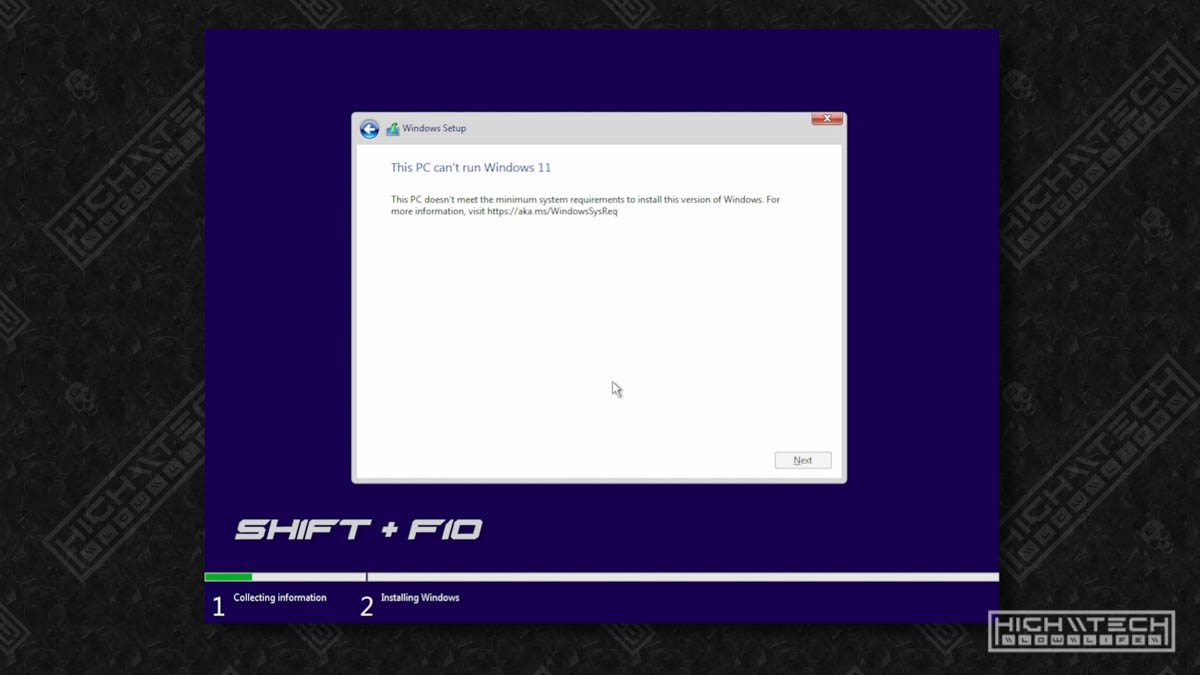
This guide will allow you to install Windows 11 on older hardware, or any computers that don’t fit the requirements for Windows 11 installation. You will get an error for either TPM module is not up to date, or not the current version 2.0, or you will get an error that your processor is not valid, or might get one that you don’t have enough RAM to install, either way it should be your choice on installing Windows 11 on your computer, not Microsoft’s.
I recently was making a video and wanted to install Windows 11 on an older system and I ran into some problems. I kept getting an error that my TPM module was not up to date and also that my processor was too old!? How dare you Microsoft.
I found a way around this by using this registry bypass I found online, so I wanted to share it with you guys.
Please be aware that by doing this you’re potentially not using the ‘most’ secure version of your computers OS, although if your computer is old enough then this shouldn’t really be too much of a concern since you don’t have TPM anyway. Plus an insecure system is better than no system at all in my book. If you’re afraid of not having the most secure system, just keep using whatever version of Windows you’re on.
To get past the block screen on the Windows 11 install, you’re going to want to perform the following:
- On the blocked screen, please hit
Shift + F10to bring up the command prompt. - Type in
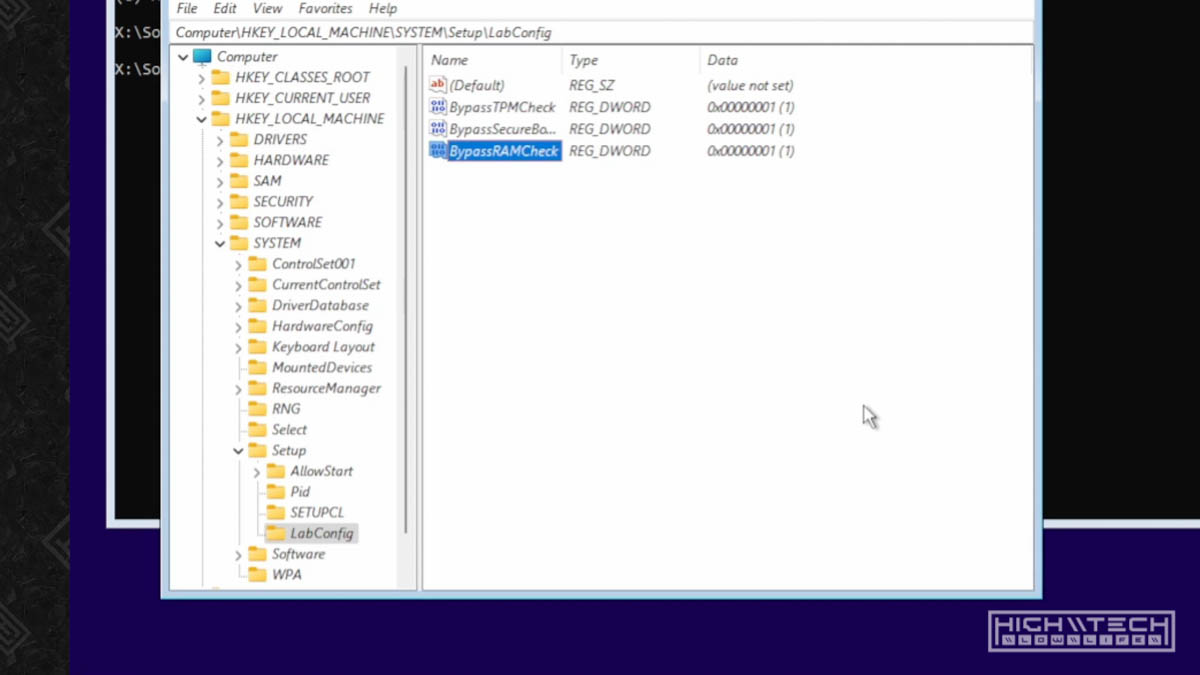
regeditand hit enter, this will bring up the registry editor - In the registry editor, navigate to
HKEY_LOCAL_MACHINE\SYSTEM\Setup - Here you’ll want to create a new key named “LabConfig” - right-click on the Setup directory and go to “New Key” - name this key
LabConfig - In this new key named LabConfig, you’ll want to create 3 new DWORD values
- Right-click and create new DWORD (32-Bit) Value and name it
BypassTPMCheck, also set the Hexadecimal value to1 - Right-click and create new DWORD (32-Bit) Value and name it
BypassSecureBootCheck, also set the Hexadecimal value to1 - Right-click and create new DWORD (32-Bit) Value and name it
BypassRAMCheck, also set the Hexadecimal value to1 - Make sure all of these new DWORD values you have created are set to 1 for their hex value
- Now you can exit both the registry editor, and also the command prompt
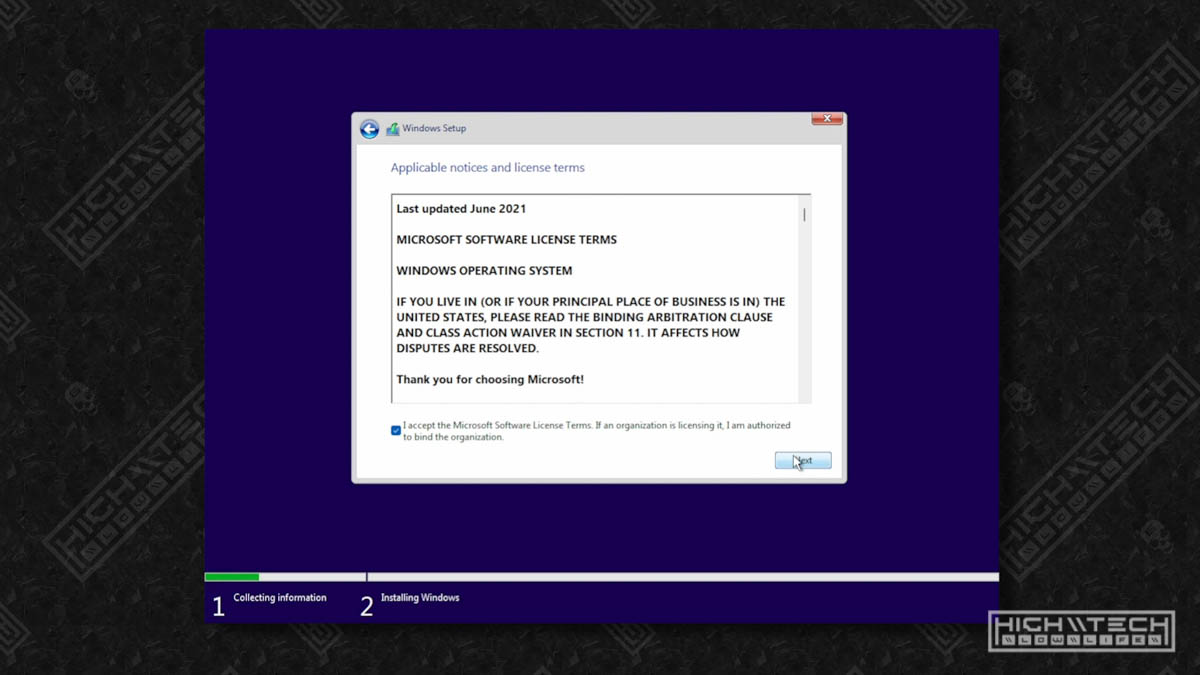
- Now press the back button on the Windows 11 install screen
- Now press “next” again to have the installer it recheck your system
- You should have gotten past the error screen and now you can continue installing Windows 11 on your older hardware — and you’re done! —
Success!
At this point I personally wouldn’t use Windows 11 as my daily driver because it has just freshly been released and they will patch and fix a ton of issues and bugs over the next few months, it might be better to wait on a computer that is mission critical.
I did find a problem installing this on a virtual machine (VM) via VirtualBox, and that is I couldn’t get past that screen even with these registry hacks, and it had to do with the fact that my VM was only set to a single processor, so there still might be a limitation if you are installing this on a single-core process (does anyone still have those in 2021?) So please set your processor to 2 (or more, I set my to 4, so I haven’t tested it with 2) and you should be good. If you do have a computer that is only single core and not very powerful I suggest looking into a lightweight linux distro instead of Windows 11.
My first impressions so far is that it is very “Mac” like in feel, lots of soft UI elements and rounded corners and I’m not particularly fond of that. I prefer the more square and sharp angles of Windows 10 personally. Also I have recently made a video on vertical taskbars and as of writing this, Windows 11 does not allow you to change the taskbar placement, which is a shame. They may reintroduce this functionality with a patch or update, but I am not holding my breath for that. Auto-hide it is.